First Light
You have read a Glimmer program. Now you build one, run it on an emulated TEC-1G, and set a breakpoint in your own source to stop it mid-run.
The program is called Beacon: one pixel in the middle of the 8x8 RGB LED matrix, and every press of the GO key steps it to the next colour. It is small enough to type in five minutes, and it still exercises the complete reactive chain (one fact, one moment, one rule and one picture) with you at the keypad supplying the moments.
The tools
One VS Code extension, Debug80, provides all the required tools: the Glimmer compiler, the assembler, and a full emulated TEC-1G, keypad and all. The setup consists of installing VS Code and adding Debug80 from the Extensions marketplace. Debug80 Book 1 provides a guided tour of the extension itself. Glimmer also has a command line for scripts and work outside VS Code; Appendix D covers it.
Beacon
The first project begins as an empty folder in VS Code, initialized as a TEC-1G project from the Debug80 panel. Debug80 Book 1 walks through the two clicks with pictures. A file named main.glim then provides the program entry point. The name is what Debug80 looks for: a file called main.glim, or ending in .main.glim, whose first declaration is program, is recognised as a Glimmer program and built.
The file contains this program:
program Beacon

platform tec1g-mon3
display matrix8x8

state Colour : byte = 1 changed

pulse Step

bind key KEY_GO rising -> Step

effect NextColour
    on Step
    updates Colour
begin
    ld a,(Colour)
    inc a
    cp 8
    jr c,_store     ; 1 to 7 are the visible colours
    ld a,1
_store:
    ld (Colour),a
end

render DrawBeacon
    on Colour
begin
    call FbClear
    ld a,(Colour)
    ld b,3          ; B = x
    ld c,3          ; C = y
    call FbPlot
end
The program uses only constructs already introduced, so the new details are easy to isolate. KEY_GO names the GO key, the big one on the TEC-1G's pad. MON-3 defines a name for every key, and bind lines use the names directly, so your source says GO where you mean GO. The other new detail is that the colour itself is a fact. The 8x8 matrix mixes red, green and blue per pixel, so the values 1 through 7 are its seven visible colours, and NextColour's wrap keeps the cell inside that range. DrawBeacon reads the fact and plots whatever colour it holds. Spoken aloud, the chain is: "GO fires Step; on Step, NextColour updates Colour; on Colour, DrawBeacon."
The first run
The Run button in the Debug80 panel starts the build and launch.
Debug80 hands your file to the Glimmer compiler, assembles the result, checks it, loads the MON-3 ROM and your program into the emulated TEC-1G, and runs. The platform panel opens on the TEC-1G, and there on the 8x8 matrix is a single red pixel. Colour started at 1, which is red, and the word changed in your declaration schedules the first drawing before you touch anything.
Each click of GO on the panel's keypad advances the colour: green, yellow, blue, magenta, cyan, white, then round again to red. Between presses, the scan keeps the pixel lit and the keypad poll keeps checking. The dispatcher skips both reactive blocks until their facts change.
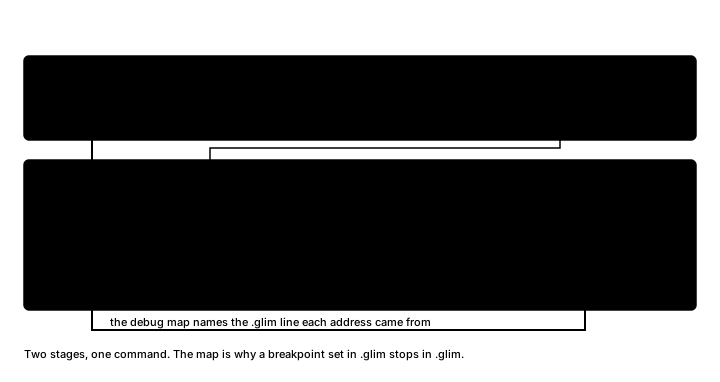
The build also created several files in the project's build folder. main.main.asm is the generated assembly program: your blocks and the machinery around them, one readable file, and the subject of the next section. Beside it sit the assembled bytes as Intel HEX, which can be sent to a physical TEC-1G, and the debug map, which records the source line every address came from. And one more build step ran: the assembler checked register contracts throughout the program. Every routine in the generated file declares which registers it uses, and every call is proven against those declarations. The classic Z80 bug, a helper quietly trampling a register your loop was counting on, fails the build with a message instead of failing the game an hour into play.
The file Glimmer wrote
The generated build/main.main.asm reads top to bottom in a fixed order, and its section comments are a table of contents:
; --- TEC-1G / MON-3 platform ---        equates: ports, API calls
; --- MON-3 key codes ---                KEY_GO's value
; --- change flags ---                   one bit per fact
; --- block trigger masks ---            one mask per block
; --- state storage ---                  the facts themselves
; --- runtime loop ---                   the frame, top to bottom
; --- input polling (MON-3 _scanKeys) ---
; --- logic phase dispatch ---
; --- render phase dispatch ---
; --- phase boundary: deliver same-frame raises ---
; --- logic block NextColour ---         your code, wrapped
; --- render block DrawBeacon ---
; --- frame rollover ---
; --- matrix8x8 profile library ---      ScanFrame, FbClear, FbPlot
Three sections show the source model as real code.
The first excerpt is the bookkeeping generated from your declarations:
; --- change flags ---
CHG_COLOUR_BIT    .equ 0
CHG_STEP_BIT      .equ 1
CHG_COLOUR        .equ %00000001
CHG_STEP          .equ %00000010

; --- block trigger masks ---
GlimDep_NextColour__B0 .equ CHG_STEP
GlimDep_DrawBeacon__B0 .equ CHG_COLOUR
Each fact receives one bit, and each block receives a mask built from its on line. The reactive model costs a few bytes and some AND instructions at runtime.
The second excerpt is a dispatcher. It tests whether any dependency of the block changed:
; --- logic phase dispatch ---
.routine
GlimRunLogicEffects:
        ld      a,(Changed0)
        and     GlimDep_NextColour__B0
        jr      z,_skip_NextColour
        call    Glim_NextColour
_skip_NextColour:
        ret
That is your on Step, compiled: three instructions and a branch.
The third excerpt handles the end of every frame:
; --- frame rollover ---
.routine
GlimEndFrame:
        xor     a
        ld      (Step),a
        ld      (Raised0),a
        ld      a,(Next0)            ; deferred raises become next frame
        ld      (Changed0),a
        xor     a
        ld      (Next0),a
        ret
Those first two stores enforce the pulse lifetime: a pulse holds for exactly one frame, and Step is cleared at the frame's end. The Next0 handoff below carries changes raised after their phase into the next frame; its purpose becomes clear when a program has more than one phase.
Your two blocks sit wrapped under Glim_NextColour and Glim_DrawBeacon, bodies exactly as you typed them, and at the bottom of the file the profile library spells out ScanFrame, FbClear and FbPlot as plain, readable routines.
A source breakpoint
A breakpoint on the inc a line inside NextColour in main.glim shows where the reactive chain reaches that rule, and it goes in before the next Run.
The beacon glows while execution continues. NextColour runs only when Step fires, and Step fires only when you press GO. Before that input, execution has no reason to reach the breakpoint.
Pressing the GO key now fires Step and reaches the breakpoint.
The debugger halts on the source line. In the registers panel, A holds the colour loaded on the line above. One step executes the increment; the next steps pass through the compare and store. Continuing lets the beacon show its next colour before the frame loop resumes.
You set a breakpoint in a declarative source file, on a line of assembly inside a rule, and the debugger stopped a full-speed emulated Z80 there with its registers visible. The debug map provides that source mapping: block-body lines belong to main.glim, so breakpoints and stepping land in your source, and when you step past the end of your block, the debugger continues into main.main.asm, the generated file described in the previous section.
Mover runs the same way. Saved in the project as mover.main.glim, it appears as a second target in the Debug80 panel. Running that target lets keys 4 and 6 steer the dot.
The next chapter adds a position and score to Beacon, then examines the forms a fact can take: State.
Exercise
Beacon's colour cycle. Beacon starts with colour 1 (red). What value and colour are visible after seven presses of GO, and what appears after the eighth press?