Create A TEC-1G Project
A Debug80 project is an initialized workspace folder. Once initialized, the folder has the settings Debug80 needs to build, launch and emulate a Z80 program.
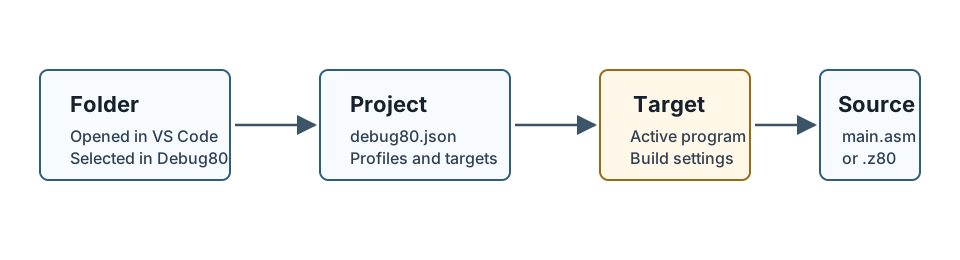
Inside a project, Debug80 runs targets. A target is the program entry point Debug80 can build and run. It names the assembly source file, the build output location and the platform that should run the result.
One project can hold several targets. A folder might gather a few small programs, experiments or examples, each with its own target.
Debug80 discovers targets from file names. A target source is either named main.asm or ends in .main.asm. The generated project starts with one target based on src/main.asm.
When you build or start debugging, Debug80 uses the selected target. It assembles the target’s source file with AZM, writes the artifacts under the target’s build directory, loads the generated code into the emulator and shows the result on the selected platform panel.
The TEC-1G platform gives the first project a practical shape: AZM source, MON-3, emulator panel and the later CoolTerm transfer path.
For a new folder, choose TEC-1G in the Project section before initialization. If you added the folder with the + button, the initialization prompt uses the platform selected in the Project section. You can also leave the folder uninitialized, choose the platform yourself and click Initialize.
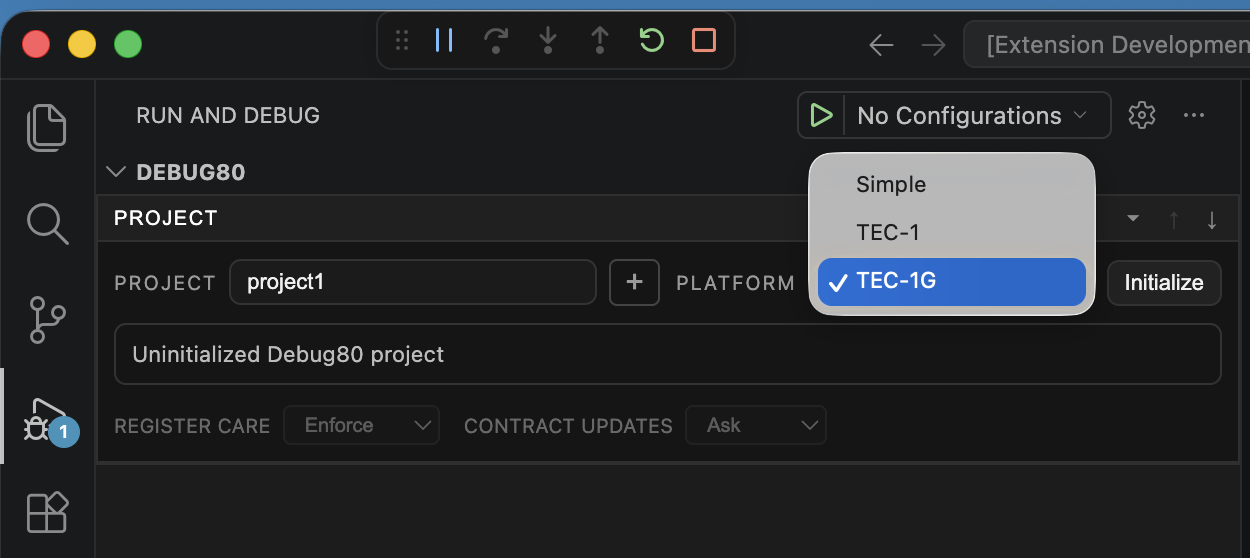
That creates a TEC-1G / MON-3 project. Its first target is placed at 0x4000, the user-code area for that platform.
Choose The Platform
The platform selector chooses the machine Debug80 should model. Use TEC-1G for this first project. Use TEC-1 when you are working with the classic board.
The selector may also show Simple for minimal emulator work. The hardware path in this book uses TEC-1G, with TEC-1 as the classic-board option.
| Platform | Use it when | User code starts at |
|---|---|---|
| TEC-1 | You are working with the classic 1980s TEC-1 board and its monitor environment. | 0x0800 or 0x0900, depending on the platform settings |
| TEC-1G | You are working with the modern TEC-1G board, which keeps TEC-1 compatibility and adds MON-3-oriented hardware features. | 0x4000 |
Picking TEC-1G selects the MON-3 start address, ROM assets and hardware behaviour.
Files Created
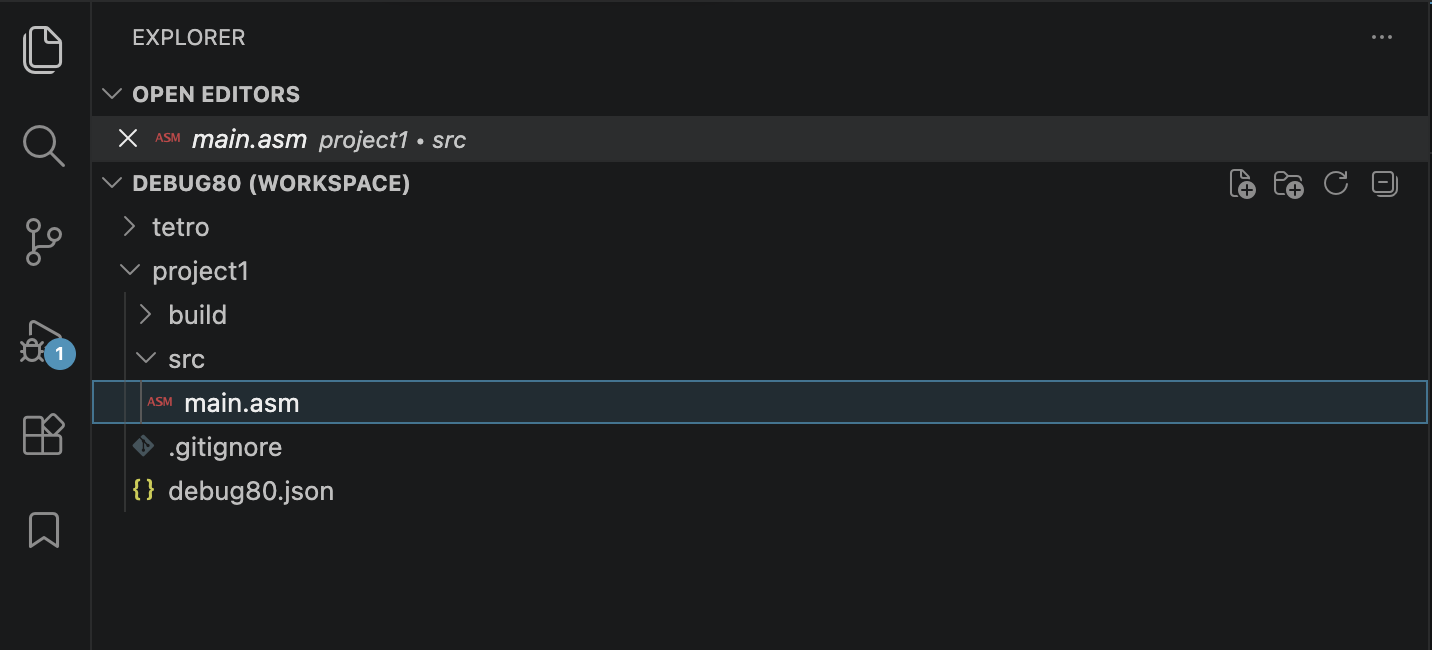
After initialization, open the VS Code Explorer. A fresh TEC-1G project contains:
debug80.json
.gitignore
src/main.asm
build/
src/main.asm is the first target. build/ receives generated files after the first build. .gitignore keeps generated output out of version control.
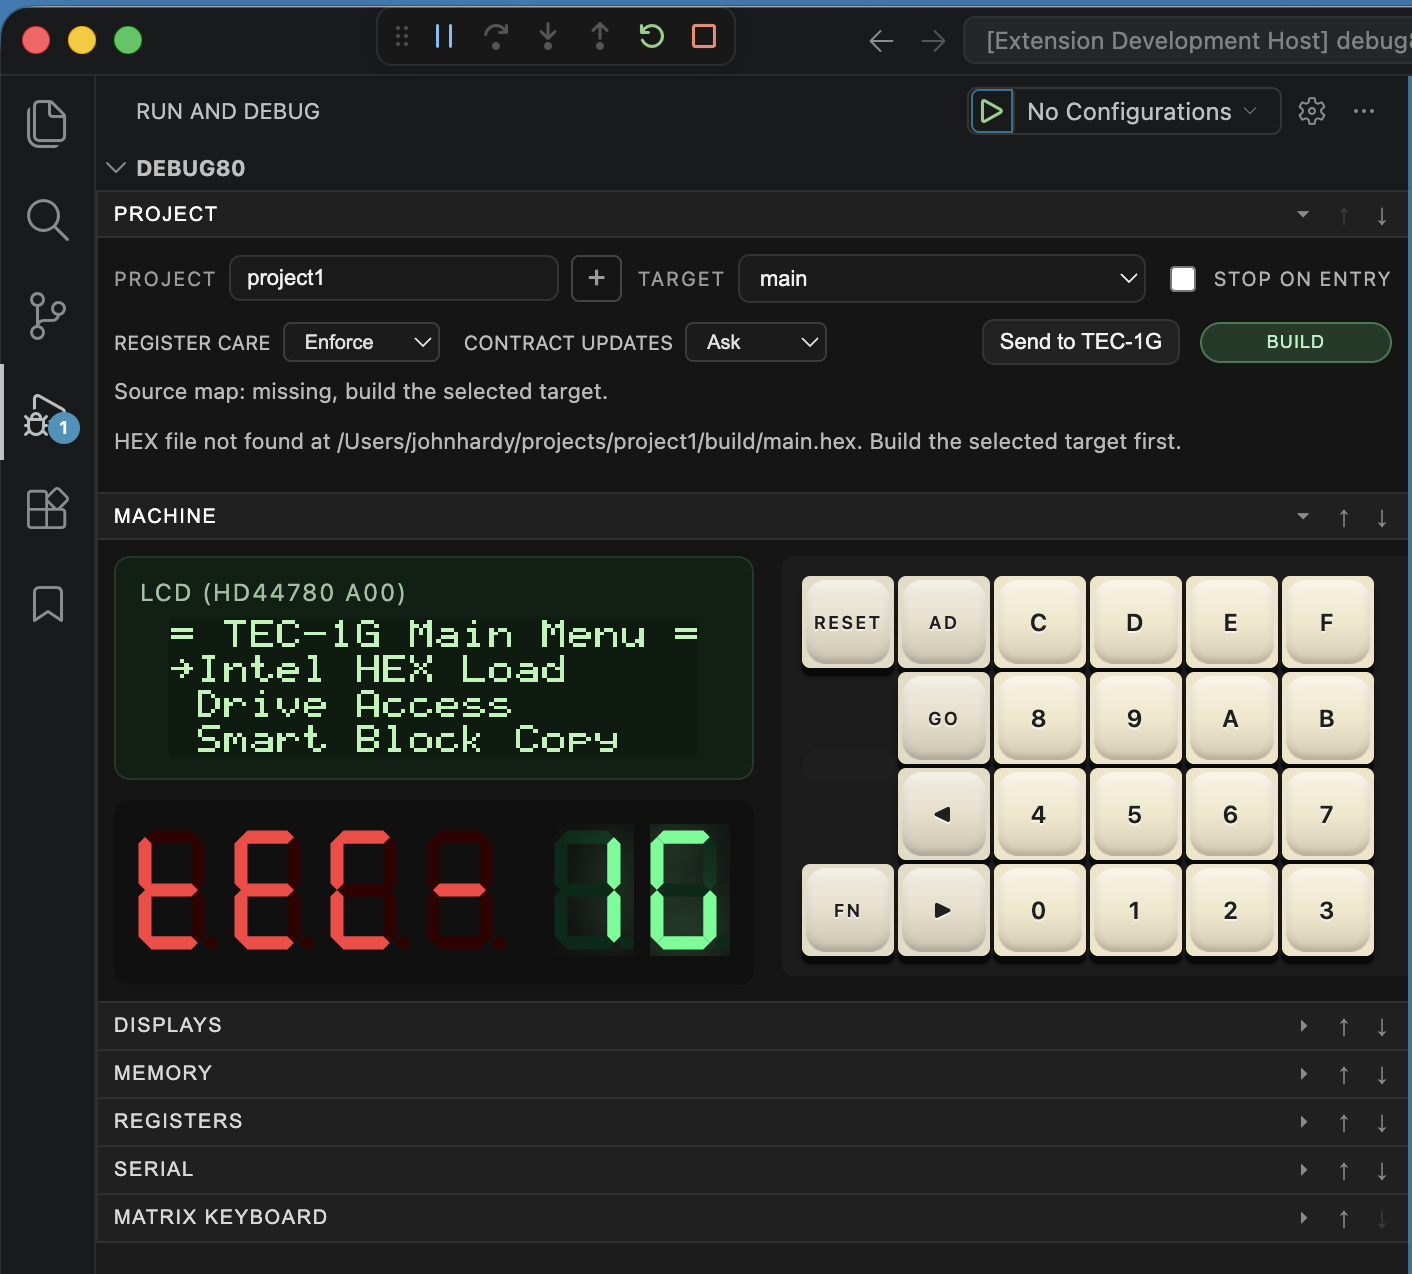
Now open the Debug80 panel. With one target, Debug80 selects it for you. Before the first build, the panel reports that the source map is missing.
The main target comes from src/main.asm.
Open The Main Target
Open src/main.asm. This is the source file for the main target:
; Debug80 starter (TEC-1G / MON-3)
; Prints a message on the LCD, then continuously scans "HELLO " on the
; six-digit seven-segment display.

API_SCAN_SEGMENTS       .equ 10
API_STRING_TO_LCD       .equ 13
API_COMMAND_TO_LCD      .equ 15

LCD_CLEAR               .equ 0x01
LCD_ROW1                .equ 0x80

        .org    0x4000

Start:
        LD      B,LCD_CLEAR
        LD      C,API_COMMAND_TO_LCD
        RST     0x10

        LD      B,LCD_ROW1
        LD      C,API_COMMAND_TO_LCD
        RST     0x10

        LD      HL,LcdLine1
        LD      C,API_STRING_TO_LCD
        RST     0x10

ScanHello:
        LD      DE,SevenSegHello
        LD      C,API_SCAN_SEGMENTS
        RST     0x10
        JR      ScanHello

LcdLine1:
        .db     "Debug80 TEC-1G",0

; MON-3 seven-segment character codes for "HELLO ".
SevenSegHello:
        .db     0x6e,0xc7,0xc2,0xc2,0xeb,0x00
Debug80 assembles this source with AZM. The build produces machine code for the emulator and a source map for source-level debugging.
What The Target Does
The .org 0x4000 line places the target in the MON-3 user program area. MON-3 remains in ROM; your target runs from RAM.
The first two MON-3 calls prepare the LCD. API_COMMAND_TO_LCD tells MON-3 that register B holds an LCD command. The target sends LCD_CLEAR, then LCD_ROW1.
The next MON-3 call prints the message. HL points at LcdLine1, and API_STRING_TO_LCD tells MON-3 to copy the zero-terminated string to the LCD.
After the LCD text is written, execution stays in ScanHello. Each pass points DE at SevenSegHello and calls API_SCAN_SEGMENTS. The six-digit seven-segment display must be refreshed continuously to stay visible.
Run It From MON-3
Click Build in the Project section. Debug80 assembles the program with AZM and loads it into the emulated TEC-1G at 0x4000.
The panel comes up in the MON-3 monitor. Press AD to enter address mode, then key in:
4000
The panel now shows address 4000.
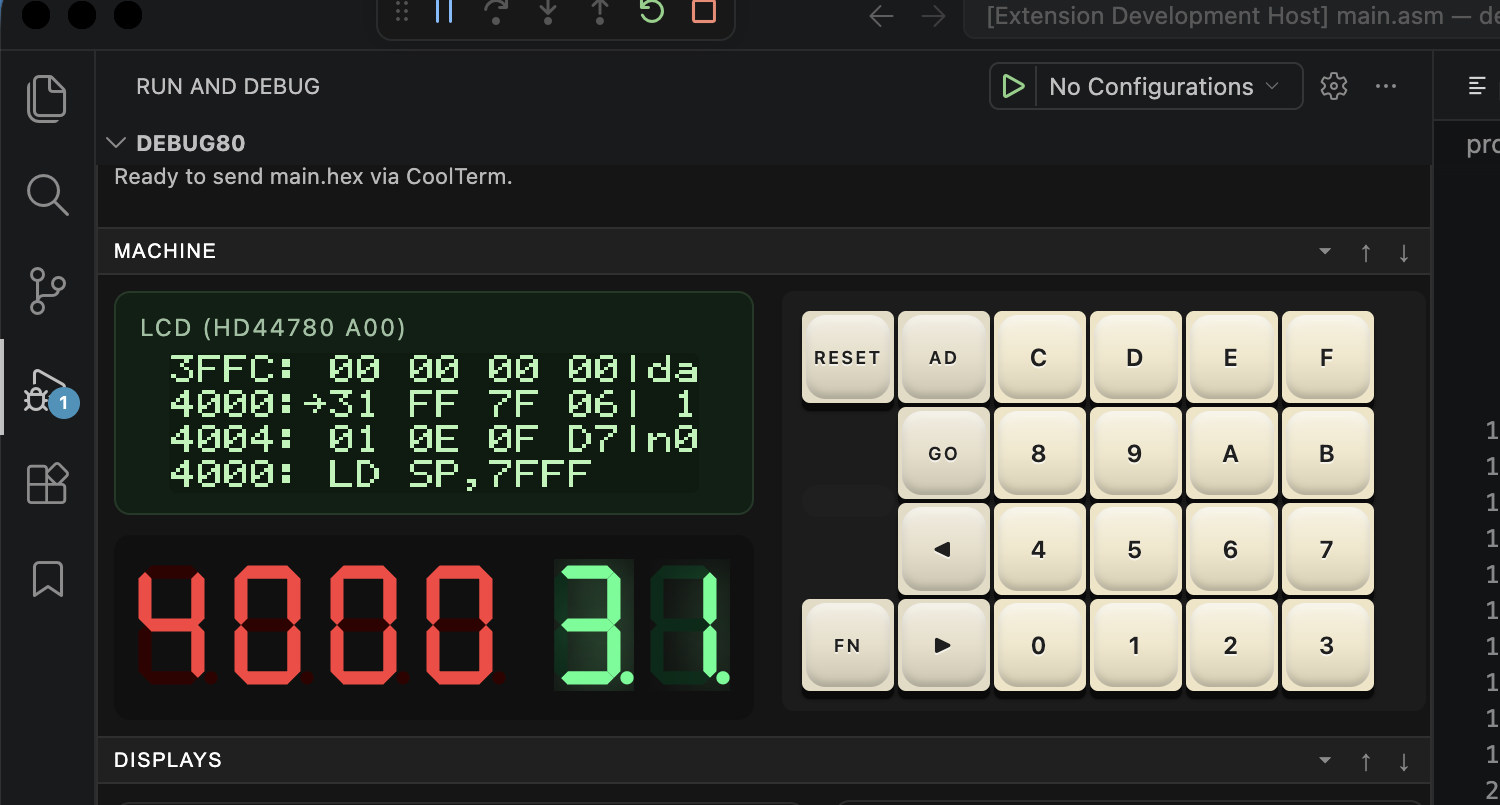
Press GO to run the program at the displayed address.
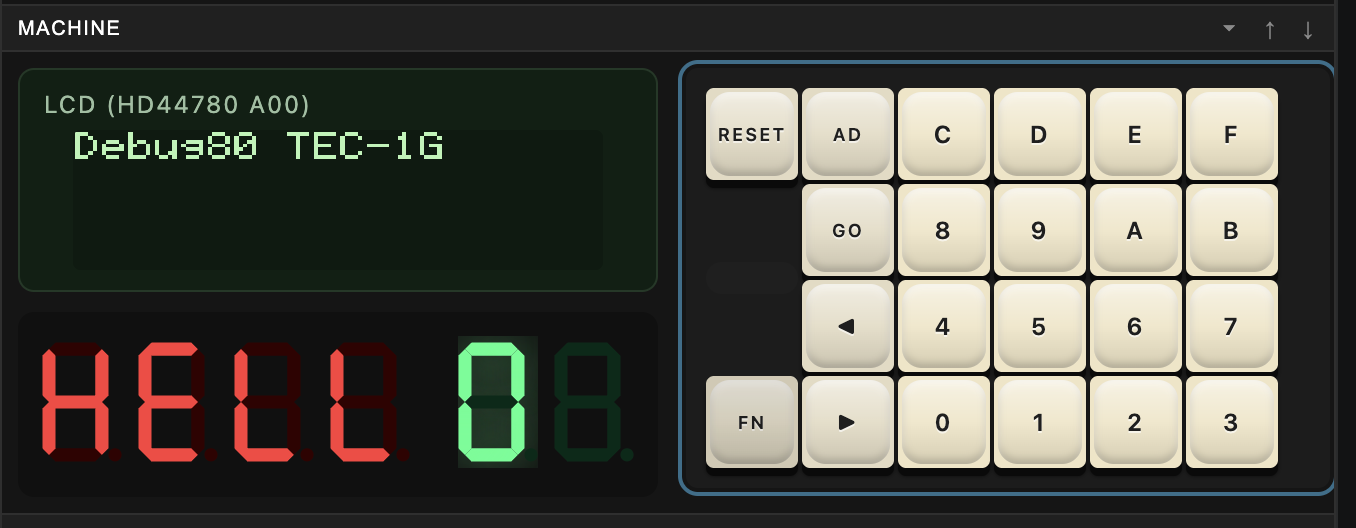
The LCD and seven-segment display confirm the path: AZM assembled the source, Debug80 loaded the HEX into the emulator, MON-3 jumped to 0x4000 and the target produced visible TEC-1G output.
Change The LCD Message
Open src/main.asm again and find the string at LcdLine1:
LcdLine1:
        .db     "Debug80 TEC-1G",0
Change the text between the quotes:
LcdLine1:
        .db     "Hello from Z80",0
Save the file, then click Build. Debug80 assembles the target again and loads the new program into the TEC-1G emulator. Run it from 0x4000 as before; the LCD shows the new message.